I couldn't find any specific guides with pictures for disassembling the 2010 MS3 center console (it is a tad different from gen1) for installing the TWM Shifter Bushings. Luckily it wasn't that hard, but for someone who's never really modded a car before, even pulling apart plastic housing can seem a little intimidating. Until you put in some elbow grease. ")
Anyway, this guide is primarily for a buddy of mine with some conjecture and should just be used as an accompaniment so there shouldn't be any surprises. This is a very minimal install and does not require disassembling and removing the entire console, though it may be necessary if you have large hands or don't have access to someone with small hands.
First time pulling apart the center console, pull the e-brake up as high as possible, start with the cupholder open, stick your hands inside and pull as straight vertical as you can. The sides and front actually came out for me first, with the back last. But ideally the back should come out first as clip holding it in is different from the rest, and if you're lucky, the motion will loosen the shifter housing as well.
If not, no big deal. After removing the cup holder, took off the shift knob, and then I stuck my hand in and stretched the inside console housing a little to free the bottom clips of the shifter cover.
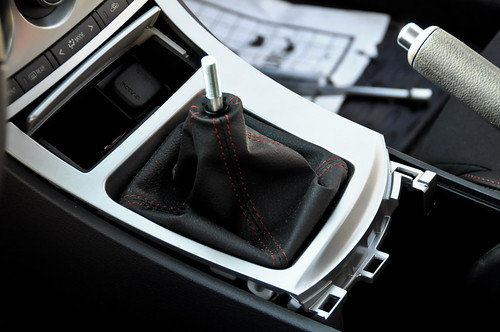
At this point, gently tug from the bottom and lift up slightly. The whole thing should come out. Remember to raise the shift boot over the threaded shift lever.

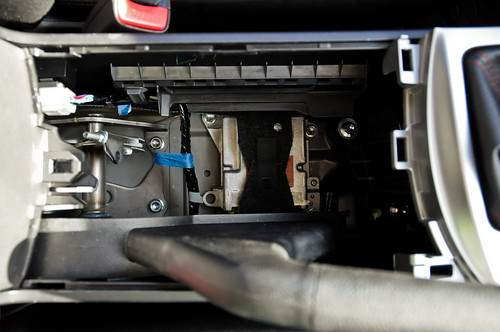
The areas in the green circle pop right out when you insert a flathead screwdriver. My guess is they're for heated seats which we don't have! For the 12V DC adapter, take off the blue housing, and look for a vertical slot along the beige housing. Plop in a flathead and it's all clear.

For the ball-socket circled in blue, I used needle nose pliers wrapped in electrical tape and lifted rather than using the edge of the housing as a fulcrum. Do both. Also, pull the shift cable joints out of the housing circled in green. They're in a bit tight, left one came out easier than the right one. Pull as straight vertical as possible. They click in and out.

I had to tug and remove the cable circled in red. Takes a fair bit of force. One of three things will happen: the ziptie will pop out of the plastic housing, the ziptie itself will undo itself (this happened to me), or the clip will break. Also you see the two 10mm bolts.
After everything was removed, took out the four bolts. Removed each thrust washer with a very small flathead screwdriver as a wedge. To remove the rubber bushing, I stuck my hand underneath the housing, grabbed at it, and used needle nose pliers to pinch the top of the bushing and force it out the bottom while pulling on it simultaneously.
When installing the new shifter bushings, be very gentle when sliding them under the shift housing as they can fall under the carpet along the sides. Align them as best you can, put on the washer and realign each hole with the 10mm bolt. Tighten down evenly as if you were changing a tire, and reverse everything above.
Then go for a ride! Shifter feels absolutely amazing now. It almost pops right into the gear with minimal effort and less focus. Definitely feels more bouncy as the rubber washers dampened that effect, but missed 2nd-3rd shifts seem mostly eliminated for me.
---
Additional resources:
Santiago's gen1 MS3 pictorial
Redline Goods Guide in PDF
Anyway, this guide is primarily for a buddy of mine with some conjecture and should just be used as an accompaniment so there shouldn't be any surprises. This is a very minimal install and does not require disassembling and removing the entire console, though it may be necessary if you have large hands or don't have access to someone with small hands.
First time pulling apart the center console, pull the e-brake up as high as possible, start with the cupholder open, stick your hands inside and pull as straight vertical as you can. The sides and front actually came out for me first, with the back last. But ideally the back should come out first as clip holding it in is different from the rest, and if you're lucky, the motion will loosen the shifter housing as well.
If not, no big deal. After removing the cup holder, took off the shift knob, and then I stuck my hand in and stretched the inside console housing a little to free the bottom clips of the shifter cover.
At this point, gently tug from the bottom and lift up slightly. The whole thing should come out. Remember to raise the shift boot over the threaded shift lever.
The areas in the green circle pop right out when you insert a flathead screwdriver. My guess is they're for heated seats which we don't have! For the 12V DC adapter, take off the blue housing, and look for a vertical slot along the beige housing. Plop in a flathead and it's all clear.
For the ball-socket circled in blue, I used needle nose pliers wrapped in electrical tape and lifted rather than using the edge of the housing as a fulcrum. Do both. Also, pull the shift cable joints out of the housing circled in green. They're in a bit tight, left one came out easier than the right one. Pull as straight vertical as possible. They click in and out.
I had to tug and remove the cable circled in red. Takes a fair bit of force. One of three things will happen: the ziptie will pop out of the plastic housing, the ziptie itself will undo itself (this happened to me), or the clip will break. Also you see the two 10mm bolts.
After everything was removed, took out the four bolts. Removed each thrust washer with a very small flathead screwdriver as a wedge. To remove the rubber bushing, I stuck my hand underneath the housing, grabbed at it, and used needle nose pliers to pinch the top of the bushing and force it out the bottom while pulling on it simultaneously.
When installing the new shifter bushings, be very gentle when sliding them under the shift housing as they can fall under the carpet along the sides. Align them as best you can, put on the washer and realign each hole with the 10mm bolt. Tighten down evenly as if you were changing a tire, and reverse everything above.
Then go for a ride! Shifter feels absolutely amazing now. It almost pops right into the gear with minimal effort and less focus. Definitely feels more bouncy as the rubber washers dampened that effect, but missed 2nd-3rd shifts seem mostly eliminated for me.
---
Additional resources:
Santiago's gen1 MS3 pictorial
Redline Goods Guide in PDF