2004 to 2020 Mazda 3 Forum and Mazdaspeed 3 Forums banner
41 - 57 of 57 Posts
That looks like it might be the right catch for me. Would You mind explaining an idiot (me) how to install it?
I posted this as a Reddit comment a while back:

No. For the IGN-1, the red goes to a constant 12v source. I used one of those quick taps in an empty spot in the fuse block in the kick panel - https://www.amazon.com/gp/product/B01BU59K90/ref=ppx_yo_dt_b_asin_title_o08_s00?ie=UTF8&psc=1
The black of the IGN-1 goes to ground, and the blue of the IGN-1 will be your 12v switched output, which will plug into the red (ACC wire) of that hardwire kit. The yellow of the hardwire kit will go to a 12v constant source. You could just wire it in together with the red of the IGN-1. And the black of the hardwire kit will go to ground, so you could wire it in with the black of the IGN-1. That should be it off the top of my head.
Give the instructions a good read, and let me know if you have any questions. It's pretty straight forward, but I'm happy to help.
 
Discussion starter · #42 ·
Okay, here's something interesting that I found in another thread. Apparently, the large grommet you ran your wires through has a nipple. Several people said that if you cut the top of the nipple off it leaves behind a hole that you can run wires through. I haven't tried it myself, but here's a picture.
I can confirm that this in fact did work for me. You just need to be very, very careful. There are a lot of sensitive wiring harnesses surrounding the nipple.
 
Hi there new to the forum. Been looking at how to install the blackvue dashcam along with the pmp on my girlfriend new mazda 3. I have been looking online for information on how to get it wired up and ended up with nothing as the cabin fuse are all hot. After alot of head scratches on how to get this dashcam to work i started pulling stuff apart I found a way to get through to the engine bay without any problems. I used the accessory socket fuse for my switched wire and one of the fuse inside the cabin for my constant. After all that tested the dash cam and its all working. I don't have photos with at this stage but can get some for those who wants to know. Also this is for the rhd australian mazda 3.
 
Hi there new to the forum. Been looking at how to install the blackvue dashcam along with the pmp on my girlfriend new mazda 3. I have been looking online for information on how to get it wired up and ended up with nothing as the cabin fuse are all hot. After alot of head scratches on how to get this dashcam to work i started pulling stuff apart I found a way to get through to the engine bay without any problems. I used the accessory socket fuse for my switched wire and one of the fuse inside the cabin for my constant. After all that tested the dash cam and its all working. I don't have photos with at this stage but can get some for those who wants to know. Also this is for the rhd australian mazda 3.
Uh, maybe a pointer or hint on what stuffs did you pull apart so that you easily found a way to run through cables to the engine bay?
 
Hi all
I own a new 2020 mazda 3 manual, I want to install my old dashcam, but I didn't want to run a cable through the engine's firewall, neither the USB nor the mirrortap, so this is my solution.
I made a custom relay activated by an accelerometer sensor controlled by an arduino , which can be programmable to behave differently (sensor sensitivity, off delay time, different power mode to save battery life).
The installation is still from inside the fuse box .
What it does is: the relay turns on the dashcam when the sensor detect motion, then when the car stops after a while (10 min for me) it will turn off the dash cam.
So far so good, it works as expected, just to make a couple of tweaks to the arduino code.

let me know what you guys think

Image
Image
Image
Image
Image
Image
 
Here's my setup for now. I originally had plugged into 12v in the center storage, but wire was poking out to the side.
Used switch and hid it in the left side small storage, using interior fuse box connected to audio. I think its F13.
As you already know interior fuses are constant power. The hard wire kit I have has voltage limiter, so it stops when voltage drops below 12 if I forget to switch off. Also set the dashcam to turn off if no activies are captured.
So far so good, just need to switch off before I get out.
 

Attachments

I spent quite some time following this thread and considering the custom relay or dashcam hardwire kit. However, my solution is I realized that my dashcam actually support (1) timelapse mode which takes 1 frame per second. (2) auto turn off after certain times which can be controlled by the dashcam smartphone app.

So, my final setting is to set the camera to enter Timelapse mode after 15min of inactivity and auto turn off the dashcam completely after 1 hour.

I've tried this setting for a few days, dashcam really turned off on its own after 1hr and I still can start the car the next morning :)

My dashcam mini Dash Cam-DDPAI social camera,Image My World

278978
278979
 
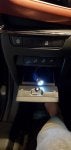
So I have been running my camera for about 18 months connected to an internal fuse and it has been working fine, shutting down as expected. After seeing all these posts I thought I would do some testing and I think I have a 100% working solution for those that want to utilise the internal fuses which we all know are not switched and are all constant.

So the solution to this and the issue with constant fused power is to make sure you purchase a dashcam with Parking mode, or enable it on your current camera. What Parking mode does is it shuts down the camera when stationary, normally this time is around 5 minutes but can be longer depending on model. Then if for what ever reason the system detects movement, using the G-Sensor the camera will turn back and and begin recording, again this starts the timer off again before shutting down. Most dashcams facilitate this function by utilising an internal camera battery which is often a very small rated mwh, the constant fuse will actually charge the camera a little during this 5 minute on time.

Sadly if you camera doesn't have a Parking mode (other than its cheap and needs binning), your only option is to hardware to the fuse under the bonnet (or buy a new camera :D)

p.s if you don't use Parking Mode, your camera will record 24/7 and your car battery may go flat in less than 48 hours. If this does happen, you may have to call breakdown, as the Mazdas hate a flat battery, even if you charge it up the car may not start and if you do get it started you may have loads of error codes to clear (essentially every system fails and generates and error code).

p.p.s some dashcams allow you to plug power directly into the camera itself, or a GPS receiver, make sure you plug into the receiver and not the camera as this can affect packing mode.
 
We've had the Vivo A119S for nearly 4 years now, the capacitor version, not battery powered. Mounted right behind the rear view mirror in a way that it is 90% covered in the eyes of the driver.
Accidentally left it on overnight many times, luckily never a flat battery.

Not sure how a capacitor is technically different from a battery-powered version, but very happy with it.
Just ran the wire across the headliner, down the A pillar, under the floormats and into the centre console box's cig lighter.
 
I used a USB to Cig Lighter adapter to connect to the USB . Then used another Socket Cigarette Lighter Splitter where the Dashcam and RD are connected.
 
Hi there new to the forum. Been looking at how to install the blackvue dashcam along with the pmp on my girlfriend new mazda 3. I have been looking online for information on how to get it wired up and ended up with nothing as the cabin fuse are all hot. After alot of head scratches on how to get this dashcam to work i started pulling stuff apart I found a way to get through to the engine bay without any problems. I used the accessory socket fuse for my switched wire and one of the fuse inside the cabin for my constant. After all that tested the dash cam and its all working. I don't have photos with at this stage but can get some for those who wants to know. Also this is for the rhd australian mazda 3.
Hey mate, care to share how you got to the engine easily? Thanks
 
It's been posted several times and by far the easiest and safest way to have ACC switched power is to follow what Mazda uses to install their OEM Wireless Charger.
It's all detailed here:
I'm adding pdf instructions for the charger installation and since the wiring diagram is large I've composed a shortened version to show where ACC power originates and where you need to tap. Use an inline Fuse.
Image
 

Attachments

41 - 57 of 57 Posts