This build thread will be ongoing, covering around 35 mods (at least so far). It started with our GT hatch arriving this past Wednesday (3 1/2 months after it was ordered).
"Traveler" is my wife's car (and she named it that, said it was fitting because of all our our road trips), though I will luckily drive it when she is not, and when we travel.
For each mod, I have included the part number and/or a referral link, of course pricing, and for many also a picture. It is to give others' ideas, and easy means to follow up on any item(s) that is of interest. And I heartily thank many fellow M3R members whose builds gave me many of the below ideas I excitedly have done/will be doing.
This thread is about our personalizing and having fun with our "daily driver," so those who are just looking for power mods or racing parts, no need to re-visit this thread in that regard.
As we live in the country, with a gravel road the last mile, lowering is not an option (though we wish otherwise).
The car's specs, OEM options are in my below signature section, so not repeated.
My dealership (Power Mazda, Salem, OR) was beyond excellent, from initial purchase to, on delivery day, their giving me their detailing bay to do my inspection, washing and detailing. In fact when I went in to buy it, THEY volunteered that as Mazda has just upped their contribution to dealerships on our model by $1,000, our price would be $1,000 less than specified in our written Jan. 25th contract.
My doing the initial wash with foam cannon in dealership's detailing bay and pictures of how it looked at the dealership are below in the thumbnail pics. (below thumbnails). Initial pictures I
MODS:
1) Removed OEM 18" silver wheels (they will later be black chromed, powder-coated, becoming its winter wheels); installed OEM 18" dark-alloy accessory wheels, P/N # B45B-V3-810 ($1,200 list; paid $895 for the set at my dealership. (Pics later in this thread.)
2) The OEM Dunlop's became "extinct" right away, when I traded them in to my local Discount Tire store for Michelin A/S 3+'s (net @ $496/set -- including mounting and Hunter Road Force Balancing). As we have tons of really good tire threads, for those wanting to explore these tires, here's just a starting link:
https://www.tirerack.com/tires/tire...&autoMake=Mazda&autoYear=2017&autoModel=Mazda3 5-Door&autoModClar=Grand Touring
I immediately noticed the level of tire noise was significantly reduced with the Michelins!
3) Installed Racing Beat exhaust:
Bought from Good-Win Racing at $448 ($520.36 including shipping):
Racing Beat 71214 Exhaust System - 5 Door 2014 Mazda3 Skyactiv 2.0/2.5 for Mazda3 2013-2015
My wife choose this exhaust. She had asked me to choose two "semi- finalists," and I did, e.g., RB and Borla -- and to then share with her video clips of both of them before she made her choice. I like both. Expected arrival/installation around May 11th.
4) Installed Rokblokz mud flaps, the short version, ($89.95, with free shipping).
Rally Mud Flaps for the 2014+ Mazda3 Hatchback FREE SHIPPING! - rally mud flaps
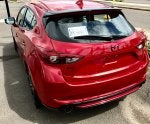
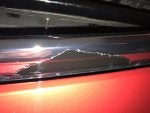
5) De-badged rear.
Removed chrome Mazda emblem, "Mazda 3" letters/numbers, and SkyActiv badges, as well as the chrome Mazda emblem. However, this coming week, an Evil M rear black emblem and a custom GT badge will the cover "OEM pinholes."
With just a corner of the Rokblokz (LOL)... Wow, do the factory tips look puny compared to the Racing Beat's ones in the picture later in this thread.
The Evil M was purchased off eBay ($9.99 shipped). My listing is no longer available but many others, and in many colors, such as this one are:
JDM MAZDA3 / MAZDASPEED 3 EVIL METAL 'M' REAR TRUNK EMBLEM BADGE GLOSS BLACK | eBay
6) Custom painted GT badge is now completed but not yet mounted on the hatch. It will cover over hatch "Mazda 3" mounting pin holes. Picture of the badge is now in post # 22.
Originally purchased metal "GT" badge was chrome/black from eBay -- though several other color options available ($4.96 shipped)
METAL GRILL TRUNK EMBLEM DECAL LOGO TRIM BADGE POLISHED BLACK LETTERING GT
7) Installed OEM 1" black lug nuts and OEM black locking lug nuts ($99.50 for both.) More expensive than other options, but both maintain Mazda's short, standard 1" lug nut length. Black wheel locks are P/N # 0000-88-BLK-BP; black lug nuts (20) are P/N # QMST-LA-000. (Picture below in # 12)
****
Certainly not a "mod," but removed rear headrests for more open interior feeling. The rare times when we have rear passengers (other than the dog), will temp reinstall.
****
8) Progress Rear Sway Bar installed (see "Pricing Note" below): P/N # 62.1127. Lists at $165.95; paid $150 @ PannAuto: Not listed on line; call Tom @ 858.278.7266.
Dealer installed it for $100; said they will stand behind it. Car now handles flatter through the curves (less body roll), and turns in better on curves. Also the steering is much more linear, i.e., instead of the car understeering and my needing to thus feed in extra steering input to get through a sharp corner quickly, I turn the wheel now in direct proporation to the amount of the curve. Very important upgrade!
Progress Technology: Anti-roll bars, sport springs, coil-overs, camber kits and more since 1995!
9) Installed Tanabe Strut Tower Bar: Tanabe Sustec Strut Bar, P/N # TTB137F @$120. Purchased from PannAuto. Contact is Tom @ 858.278.7266. (Lists at $139; paid $120)
Tanabe USA Inc. - Sustec Tower Bar.
Pann Auto Performance - San Diego largest aftermarket automotive performance parts - What do you drive? - Homepage
10) OEM Door sills put on: Mazda P/N # 0000-8T-L31A (List of $125; paid $96 at my dealership.). While this option initially was part of my initial order, to be "port installed," did not occur, so I installed them.
11) Installed the Appearance Package Side Sills: P/N # QBME-51-P10B-51 (Lists @ $399.95; paid $297.96)
thick[/I], and super hard, functioning-impossible to sever, and to compound things, the blades are also glued to to the splitter. Consequently, the blades can not be separated from the splitter. Thus, your painter must be an excellent taper, finalizing his/her taping with "fine line" tape to make this look good.
List for the OEM sliver-black splitter, P/N # QBM2-50-AH0-S5, was $399.95; paid $304.99.
NOTE: My body shop consequently strongly recommends anyone doing similar blade-painting, to start with the silver bladed version, for so much easier to cover over silver than the pure black -- avoiding an extra primer paint layer.
18) Another part of the Appearance Package, the black door mirror caps, are now on. Picture in post # 56.
CRITICAL NOTES:
1) There are different mirror caps, with different part numbers depending on whether your car was made in Japan or Mexico;
2) The caps for 2017 were redesigned, with different part numbers, to reduce wind noise -- but sorry, have no idea if they are "backwards compatible."
Mine was made in Japan and thus:
P/N # B63B-69-1N7-51: Left side. (List@$54.95; paid $39.75.)
P/N: B63B-69-1N1-51: Right side. (List @$54.95; paid $39.75.)
Picture and insert in post # 56.
19) Window tinting finally done. Installed LLumar 35CH on all windows except nothing on the windshield. BTW, the "CH" stands for, duh, charcoal (I had to ask). Llumar film has a 38 VLT rating; however, it nets out as a 35 VLT net due to Mazda's standard, very light window tint, and I was given an "Oregon Certificate of Tint Compliance" as @arathol noted in the separate window tint thread a few days ago. Plenty dark for me, and I like its appearance. Pictures in post # 56 and 57.
20) Speedline hood strut system put on: Mazda should do this as OEM in the U.S ($44.99 from Speedline)
From Speedline, hood strut system @ $44.99
[url=http://www.thespeedline.com/2014-2015-2016-mazda3-mazdaspeed-hood-damper-strut-lifter-oem-joint-mazda-axela-bm/]2014 2015 2016 Mazda3 Mazdaspeed hood damper strut lifter OEM Joint Mazda Axela BM - THESPEEDLINE ~ The Speedline nabobery
21) Mazda Premium floor mats put in(available in Canada and also from Welcome to Mazdaparts.com)
Front: P/N 00VP-M3-FL10 @ $96.41 USD:
https://mazdashop.ca/collections/20...17-mazda-3/products/premium-floor-liners-1st-row-mazda-3-3-sport-2014-2015-2016
Rear: P/N 00VP-M3-FL20 @ $ 96.45 USD
https://mazdashop.ca/products/premium-floor-liners-2nd-row-mazda-3-3-sport-2014-2015-2016
Note: Price for the front ones have gone up since, guessing because they were backordered so long and the above site now had a long waiting list.
Picture in post # 67.
22) Mazdaspeed aluminum alloy pedal covers installed. ($38.95). Preferred their look, especially compared to OEM ones at $196 list/set.
MT Manual Aluminum Gas Foot Rest Pedals Mazdaspeed Fits Mazda3 2014 2015 2016
As all who have tried have experienced (and noted), it is a bitch to stretch the rubber over and behind the clutch and brake metal pedal backing plates. Hair dryer method worked best for me, as in:
http://mazda3revolution.com/forums/...-3-skyactiv-how-guides/36785-how-install-aluminum-brake-pedal-pad-easy-way.html
Picture in post # 67.
More install info our alloy pedal thread, thought needed to go to plan "B" to secure the dead pedal to the floor mat. For $4.19, used these:
https://www.amazon.com/VELCRO-Brand...-products&ie=UTF8&qid=1495663465&sr=1-8&keywords=Velcro+Brand+industrial+strips
23) Paint correction/protection program completed, leading up to final step of Wolfgang Uber Ceramic nano-coating. It is a nano-ceramic coating that leaves a silica-based clear, super-shiny finish that is eight times harder than factory clear coat, and thus is more resistant to swirl marks and light-surface-scratching; AND the nano-ceramic lasts two to three years without the need for any waxing. Complete protection program:
* Washed; IronX; treated with Nanoskin Autoscrub fine grade mitt (instead of clay bar process); re-washed, then taped off for hand polishing to prevent polish from getting into seams (using car masking tape). I hate taping!
* Hand polished, using Griot's hand polish applicator $7.99) and Meguiar's 205 Ultra Fine Polish ($20.24)
BLUE Hexgrip Car Polish | Applicator Pads | Auto Detail
https://www.amazon.com/Meguiars-Mir...h/dp/B001O7PNXC/ref=sr_1_1?ie=UTF8&qid=1495335472&sr=8-1&keywords=meguiar's+205
* Wiped down entire car to remove tape residue/fractional left-over polish. Used Wolfgang's Perfekt Finish Paint Protector ($24.99), though IPA cheaper.
Wolfgang Perfekt Finish Paint Prep
* Applied Wolfgang Uber Ceramic (WUC) nano-ceramic coating ($124.99).
Note: Wolfgang also applied over SunTek.
Wolfgang Uber Ceramic Coating
Pics in post # 119.
24) Interior LED bulb kit upgrade. Also license plate lights. Think a total of 9 bulbs. Bought from Corksport ($49.99). So easy; very nice and much-brighter lighting.
https://corksport.com/corksport-led-light-kit-for-2014-mazda-3.html
CorkSport DIY:
http://support.corksport.com/instructions/Axm-9-011-WEB.pdf
25) Valve Stem Caps: Billet Aluminum, Black, with o-rings. Mine are Aerotechnica # 200174 (which I had bought years ago saved for some future car). Picture in post # 78. Nice that they come five in a container -- just in case. Now one can buy visually near-identicals in black chrome at $4.08 from Amazon with free shipping, and of course they have tens of other styles.
https://www.amazon.com/Hexagon-Styl...ref=sr_1_21?ie=UTF8&qid=1495821619&sr=8-21&keywords=Black+valve+stem+covers#Ask
Often the littlelist things bring forth a smile...
26) LED backups bulbs installed. So easy, thanks to Will@Prolightz. Paid $29.95/pair, # PL 360 White, super bright, super easy to install. Pic of the bulbs in post # 81. Will is terrific, as are his bulbs -- and their 2 year warranty.
http://www.prolightz.com/led/led-bulbs.html; (819) 230-3445
27) Calipers painted Mazda's Soul Red Metallic: Used G2's custom paint. They make their high temperature custom caliper paint in every color-- just needing a vehicle's paint code. My custom mixed paint, using Mazda's paint code 41V, was $109 shipped. However, many standard colors available on Amazon for about $45.
Custom: G2 Brake Caliper Paint Systems: 41V Mazda Soul Red Tricoat Custom Color Match Brake Capiler Paint Kit
Standard/basic colors -- about five of them: https://www.amazon.com/s/ref=nb_sb_...s&field-keywords=g2+caliper+paint+red&sprefix=G2+cali,aps,226&crid=18PTE32VN7C6
Even though I did not take off the calipers to paint them, but instead taped around them, jacking up the car to do all four calipers at once (many extra, redundant means of support), then the taping and painting (4 coats), it was a full day's work. Results were excellent (great color match and super hard and shiny).
Here is how it look 3/4's of the way through the day (I taped over all rubber and electronic components so when sprayed with brake clearer, no damage to anything).
Close up in post # 129 of how it looks in final form.
28) LED Turn Signal bulbs: Bought them from iJDMTOY; list @ $36.99/pair; paid $31.99/pair. Note, as stated later, their web site is inaccurate in their description for while they are called "No Resistor Required Amber Yellow 7440 T20 5W CREE Lights," they do include integral resistors (not the decoders they advertise and show in their install instructions). However, they are delightfully bright and now that I installed each one one a metal backing plate as is recommended (in my mind required) to dissipate the incredible heat they transmit, I am happy with them.
Error Free No Resistor Required CREE High Power 7440 LED Bulbs Pictures and install processes of the front ones are in posts #'s 148 @ 151.
29) Had my factory OEM standard 18" silver wheels powder coated (PC'd), with Prismatic Powder's "Ultra Black Chrome." Cost of $350 for all four, including a extra, "covering coat of glossy clear PC."
Pictures and more PC details in post # 165.
30) James Barone Racing short shift lever installed. EXCELLENT product, as I posted in detail in post # 174 of this thread. One of my very top mods! Nice improvement in the car's precision shifting, and great shorter throw. For $106.50 it is a bargain IMO.
Skyactiv Short Shift Arm Adapter [SKY-SSP] - $106.50 : James Barone Racing, Aftermarket Performance
DIY is the best, with superb pictures that make a sort complicated install, do-able.
\http://jamesbaroneracing.com/suppor...ort/2014+ Mazda3-6 and 2013+ CX-5 Short Shift Arm Installation Instructions.pdf
31) Just added MX-5 ND shift knob. Nice that it is more heavily weighted than OEM. Buy from Tascaparts.com @$124 total. PN's, from tascaparts.com (very nicely discounted):
For the Miata/MX-5 ND knob itself: N244-46-030B; and for the metal shift gates pattern cap: N243-46-032
There are some special install notes for my minor install customization. Important to read the following thread before proceeding, and if you wish to do it as I did, specifcally reading my post # 27 -- which raised the top of the shift knob a net of about 3/8".
http://mazda3revolution.com/forums/...da-3-skyactiv-appearance-interior/199506-oem-miata-nd-leather-shift-knob-3.html
32) Installed black Mazda "under door trim" molding (bye bye chrome ones). Paid $68 total (discounted 15% off list); P/N's: BHN9-50-640C; BHN9-50-650C; BHN9-50-660D; and BHN9-50-670D.
33) Front "U" shaped grille trim now painted Mazda's Jet Black Mica to match surround grill and splitter. Picture in post # 217.
34) UPDATE NOTE: This mod was later removed, as it was too large in diameter for comfortable finger grip.
Added "FMS" steering wheel cover as I felt the OEM steering wheel circumferential spoke was too small and diameter, and its leather covering too slippery.
Please see post #'s 244 & 245 for a picture, DIY install video, and my "driving report" after its installation.
You can buy it from the manufacturer here for $28.00:
http://autofms.com/product/fms-genu...ch-automotive-interior-accessories-black-durable-breathable-anti-slip-odorless/
Or cheaper at Amazon @ $23.79.
35) Centerline, low, front license plate mounting system (contact member @minsanity for getting one). It worked perfectly for me. $120 cost.
Pictures and install info in post # 246 of this thread.
36) Installed stronger, rear sway bar endlinks, and moved the Progress sway bar to its "strongest" setting. $69 (shipped), by GRP (German Racing Parks).
http://www.ebay.com/itm/28165096785...81650967850%26srcrot%3D711-53200-19255-0%26rvr_id%3D1177742979340&ul_noapp=true
37) Leather shift boot cover by Jason@Overland-Designs. $70 and so worth to me it, e.g., replacing the OEm vinyl one with real leather, and a touch more, matching gray stitching. Jason's work@Overland-Designs is outstanding (I have six different items of his on my '17 WRX). While he previously only did his leather word on Subaru items, I sent him, and he now has, a pattern for the 2014+ Mazda 3 manual trans, shift boot cover. If you are interested, either call him at: 1 (914) 621-2285 (EST), or email him: sales@overland-designs.com

38) I relocated the shift pin location on my James Barone Racing shift arm linkage (within the engine compartment). Where it was already a 20% shorter shift ratio, by moving the pin to its second location, my shifts are now 40% shorter than OEM. A really nice improvement on an already excellent system.
39) Grill surround “U” trim painted black. While this was done two months, forgot to include it here. I had tried four different folks to “wrap” it, and each one chickened out when they saw it, sawing things like, “well I hope I can do that, and it is going to cost you $175 even if I fail,” yada, yada. So I had my excellent body shop paint it Mazda Brilliant Black Metallic for $235. Not the cheapest option, but more durable than wrap and while many of you are good “wrappers,” that is not in my skill book.

"Traveler" is my wife's car (and she named it that, said it was fitting because of all our our road trips), though I will luckily drive it when she is not, and when we travel.
For each mod, I have included the part number and/or a referral link, of course pricing, and for many also a picture. It is to give others' ideas, and easy means to follow up on any item(s) that is of interest. And I heartily thank many fellow M3R members whose builds gave me many of the below ideas I excitedly have done/will be doing.
This thread is about our personalizing and having fun with our "daily driver," so those who are just looking for power mods or racing parts, no need to re-visit this thread in that regard.
As we live in the country, with a gravel road the last mile, lowering is not an option (though we wish otherwise).
The car's specs, OEM options are in my below signature section, so not repeated.
My dealership (Power Mazda, Salem, OR) was beyond excellent, from initial purchase to, on delivery day, their giving me their detailing bay to do my inspection, washing and detailing. In fact when I went in to buy it, THEY volunteered that as Mazda has just upped their contribution to dealerships on our model by $1,000, our price would be $1,000 less than specified in our written Jan. 25th contract.
My doing the initial wash with foam cannon in dealership's detailing bay and pictures of how it looked at the dealership are below in the thumbnail pics. (below thumbnails). Initial pictures I
MODS:
1) Removed OEM 18" silver wheels (they will later be black chromed, powder-coated, becoming its winter wheels); installed OEM 18" dark-alloy accessory wheels, P/N # B45B-V3-810 ($1,200 list; paid $895 for the set at my dealership. (Pics later in this thread.)
2) The OEM Dunlop's became "extinct" right away, when I traded them in to my local Discount Tire store for Michelin A/S 3+'s (net @ $496/set -- including mounting and Hunter Road Force Balancing). As we have tons of really good tire threads, for those wanting to explore these tires, here's just a starting link:
https://www.tirerack.com/tires/tire...&autoMake=Mazda&autoYear=2017&autoModel=Mazda3 5-Door&autoModClar=Grand Touring
I immediately noticed the level of tire noise was significantly reduced with the Michelins!
3) Installed Racing Beat exhaust:
Bought from Good-Win Racing at $448 ($520.36 including shipping):
Racing Beat 71214 Exhaust System - 5 Door 2014 Mazda3 Skyactiv 2.0/2.5 for Mazda3 2013-2015
My wife choose this exhaust. She had asked me to choose two "semi- finalists," and I did, e.g., RB and Borla -- and to then share with her video clips of both of them before she made her choice. I like both. Expected arrival/installation around May 11th.
4) Installed Rokblokz mud flaps, the short version, ($89.95, with free shipping).
Rally Mud Flaps for the 2014+ Mazda3 Hatchback FREE SHIPPING! - rally mud flaps
5) De-badged rear.
Removed chrome Mazda emblem, "Mazda 3" letters/numbers, and SkyActiv badges, as well as the chrome Mazda emblem. However, this coming week, an Evil M rear black emblem and a custom GT badge will the cover "OEM pinholes."
With just a corner of the Rokblokz (LOL)... Wow, do the factory tips look puny compared to the Racing Beat's ones in the picture later in this thread.
The Evil M was purchased off eBay ($9.99 shipped). My listing is no longer available but many others, and in many colors, such as this one are:
JDM MAZDA3 / MAZDASPEED 3 EVIL METAL 'M' REAR TRUNK EMBLEM BADGE GLOSS BLACK | eBay
6) Custom painted GT badge is now completed but not yet mounted on the hatch. It will cover over hatch "Mazda 3" mounting pin holes. Picture of the badge is now in post # 22.
Originally purchased metal "GT" badge was chrome/black from eBay -- though several other color options available ($4.96 shipped)
METAL GRILL TRUNK EMBLEM DECAL LOGO TRIM BADGE POLISHED BLACK LETTERING GT
7) Installed OEM 1" black lug nuts and OEM black locking lug nuts ($99.50 for both.) More expensive than other options, but both maintain Mazda's short, standard 1" lug nut length. Black wheel locks are P/N # 0000-88-BLK-BP; black lug nuts (20) are P/N # QMST-LA-000. (Picture below in # 12)
****
Certainly not a "mod," but removed rear headrests for more open interior feeling. The rare times when we have rear passengers (other than the dog), will temp reinstall.
****
8) Progress Rear Sway Bar installed (see "Pricing Note" below): P/N # 62.1127. Lists at $165.95; paid $150 @ PannAuto: Not listed on line; call Tom @ 858.278.7266.
Dealer installed it for $100; said they will stand behind it. Car now handles flatter through the curves (less body roll), and turns in better on curves. Also the steering is much more linear, i.e., instead of the car understeering and my needing to thus feed in extra steering input to get through a sharp corner quickly, I turn the wheel now in direct proporation to the amount of the curve. Very important upgrade!
Progress Technology: Anti-roll bars, sport springs, coil-overs, camber kits and more since 1995!
9) Installed Tanabe Strut Tower Bar: Tanabe Sustec Strut Bar, P/N # TTB137F @$120. Purchased from PannAuto. Contact is Tom @ 858.278.7266. (Lists at $139; paid $120)
Tanabe USA Inc. - Sustec Tower Bar.
Pann Auto Performance - San Diego largest aftermarket automotive performance parts - What do you drive? - Homepage
10) OEM Door sills put on: Mazda P/N # 0000-8T-L31A (List of $125; paid $96 at my dealership.). While this option initially was part of my initial order, to be "port installed," did not occur, so I installed them.
11) Installed the Appearance Package Side Sills: P/N # QBME-51-P10B-51 (Lists @ $399.95; paid $297.96)
thick[/I], and super hard, functioning-impossible to sever, and to compound things, the blades are also glued to to the splitter. Consequently, the blades can not be separated from the splitter. Thus, your painter must be an excellent taper, finalizing his/her taping with "fine line" tape to make this look good.
List for the OEM sliver-black splitter, P/N # QBM2-50-AH0-S5, was $399.95; paid $304.99.
NOTE: My body shop consequently strongly recommends anyone doing similar blade-painting, to start with the silver bladed version, for so much easier to cover over silver than the pure black -- avoiding an extra primer paint layer.
18) Another part of the Appearance Package, the black door mirror caps, are now on. Picture in post # 56.
CRITICAL NOTES:
1) There are different mirror caps, with different part numbers depending on whether your car was made in Japan or Mexico;
2) The caps for 2017 were redesigned, with different part numbers, to reduce wind noise -- but sorry, have no idea if they are "backwards compatible."
Mine was made in Japan and thus:
P/N # B63B-69-1N7-51: Left side. (List@$54.95; paid $39.75.)
P/N: B63B-69-1N1-51: Right side. (List @$54.95; paid $39.75.)
Picture and insert in post # 56.
19) Window tinting finally done. Installed LLumar 35CH on all windows except nothing on the windshield. BTW, the "CH" stands for, duh, charcoal (I had to ask). Llumar film has a 38 VLT rating; however, it nets out as a 35 VLT net due to Mazda's standard, very light window tint, and I was given an "Oregon Certificate of Tint Compliance" as @arathol noted in the separate window tint thread a few days ago. Plenty dark for me, and I like its appearance. Pictures in post # 56 and 57.
20) Speedline hood strut system put on: Mazda should do this as OEM in the U.S ($44.99 from Speedline)
From Speedline, hood strut system @ $44.99
[url=http://www.thespeedline.com/2014-2015-2016-mazda3-mazdaspeed-hood-damper-strut-lifter-oem-joint-mazda-axela-bm/]2014 2015 2016 Mazda3 Mazdaspeed hood damper strut lifter OEM Joint Mazda Axela BM - THESPEEDLINE ~ The Speedline nabobery
21) Mazda Premium floor mats put in(available in Canada and also from Welcome to Mazdaparts.com)
Front: P/N 00VP-M3-FL10 @ $96.41 USD:
https://mazdashop.ca/collections/20...17-mazda-3/products/premium-floor-liners-1st-row-mazda-3-3-sport-2014-2015-2016
Rear: P/N 00VP-M3-FL20 @ $ 96.45 USD
https://mazdashop.ca/products/premium-floor-liners-2nd-row-mazda-3-3-sport-2014-2015-2016
Note: Price for the front ones have gone up since, guessing because they were backordered so long and the above site now had a long waiting list.
Picture in post # 67.
22) Mazdaspeed aluminum alloy pedal covers installed. ($38.95). Preferred their look, especially compared to OEM ones at $196 list/set.
MT Manual Aluminum Gas Foot Rest Pedals Mazdaspeed Fits Mazda3 2014 2015 2016
As all who have tried have experienced (and noted), it is a bitch to stretch the rubber over and behind the clutch and brake metal pedal backing plates. Hair dryer method worked best for me, as in:
http://mazda3revolution.com/forums/...-3-skyactiv-how-guides/36785-how-install-aluminum-brake-pedal-pad-easy-way.html
Picture in post # 67.
More install info our alloy pedal thread, thought needed to go to plan "B" to secure the dead pedal to the floor mat. For $4.19, used these:
https://www.amazon.com/VELCRO-Brand...-products&ie=UTF8&qid=1495663465&sr=1-8&keywords=Velcro+Brand+industrial+strips
23) Paint correction/protection program completed, leading up to final step of Wolfgang Uber Ceramic nano-coating. It is a nano-ceramic coating that leaves a silica-based clear, super-shiny finish that is eight times harder than factory clear coat, and thus is more resistant to swirl marks and light-surface-scratching; AND the nano-ceramic lasts two to three years without the need for any waxing. Complete protection program:
* Washed; IronX; treated with Nanoskin Autoscrub fine grade mitt (instead of clay bar process); re-washed, then taped off for hand polishing to prevent polish from getting into seams (using car masking tape). I hate taping!
* Hand polished, using Griot's hand polish applicator $7.99) and Meguiar's 205 Ultra Fine Polish ($20.24)
BLUE Hexgrip Car Polish | Applicator Pads | Auto Detail
https://www.amazon.com/Meguiars-Mir...h/dp/B001O7PNXC/ref=sr_1_1?ie=UTF8&qid=1495335472&sr=8-1&keywords=meguiar's+205
* Wiped down entire car to remove tape residue/fractional left-over polish. Used Wolfgang's Perfekt Finish Paint Protector ($24.99), though IPA cheaper.
Wolfgang Perfekt Finish Paint Prep
* Applied Wolfgang Uber Ceramic (WUC) nano-ceramic coating ($124.99).
Note: Wolfgang also applied over SunTek.
Wolfgang Uber Ceramic Coating
Pics in post # 119.
24) Interior LED bulb kit upgrade. Also license plate lights. Think a total of 9 bulbs. Bought from Corksport ($49.99). So easy; very nice and much-brighter lighting.
https://corksport.com/corksport-led-light-kit-for-2014-mazda-3.html
CorkSport DIY:
http://support.corksport.com/instructions/Axm-9-011-WEB.pdf
25) Valve Stem Caps: Billet Aluminum, Black, with o-rings. Mine are Aerotechnica # 200174 (which I had bought years ago saved for some future car). Picture in post # 78. Nice that they come five in a container -- just in case. Now one can buy visually near-identicals in black chrome at $4.08 from Amazon with free shipping, and of course they have tens of other styles.
https://www.amazon.com/Hexagon-Styl...ref=sr_1_21?ie=UTF8&qid=1495821619&sr=8-21&keywords=Black+valve+stem+covers#Ask
Often the littlelist things bring forth a smile...
26) LED backups bulbs installed. So easy, thanks to Will@Prolightz. Paid $29.95/pair, # PL 360 White, super bright, super easy to install. Pic of the bulbs in post # 81. Will is terrific, as are his bulbs -- and their 2 year warranty.
http://www.prolightz.com/led/led-bulbs.html; (819) 230-3445
27) Calipers painted Mazda's Soul Red Metallic: Used G2's custom paint. They make their high temperature custom caliper paint in every color-- just needing a vehicle's paint code. My custom mixed paint, using Mazda's paint code 41V, was $109 shipped. However, many standard colors available on Amazon for about $45.
Custom: G2 Brake Caliper Paint Systems: 41V Mazda Soul Red Tricoat Custom Color Match Brake Capiler Paint Kit
Standard/basic colors -- about five of them: https://www.amazon.com/s/ref=nb_sb_...s&field-keywords=g2+caliper+paint+red&sprefix=G2+cali,aps,226&crid=18PTE32VN7C6
Even though I did not take off the calipers to paint them, but instead taped around them, jacking up the car to do all four calipers at once (many extra, redundant means of support), then the taping and painting (4 coats), it was a full day's work. Results were excellent (great color match and super hard and shiny).
Here is how it look 3/4's of the way through the day (I taped over all rubber and electronic components so when sprayed with brake clearer, no damage to anything).
Close up in post # 129 of how it looks in final form.
28) LED Turn Signal bulbs: Bought them from iJDMTOY; list @ $36.99/pair; paid $31.99/pair. Note, as stated later, their web site is inaccurate in their description for while they are called "No Resistor Required Amber Yellow 7440 T20 5W CREE Lights," they do include integral resistors (not the decoders they advertise and show in their install instructions). However, they are delightfully bright and now that I installed each one one a metal backing plate as is recommended (in my mind required) to dissipate the incredible heat they transmit, I am happy with them.
Error Free No Resistor Required CREE High Power 7440 LED Bulbs Pictures and install processes of the front ones are in posts #'s 148 @ 151.
29) Had my factory OEM standard 18" silver wheels powder coated (PC'd), with Prismatic Powder's "Ultra Black Chrome." Cost of $350 for all four, including a extra, "covering coat of glossy clear PC."
Pictures and more PC details in post # 165.
30) James Barone Racing short shift lever installed. EXCELLENT product, as I posted in detail in post # 174 of this thread. One of my very top mods! Nice improvement in the car's precision shifting, and great shorter throw. For $106.50 it is a bargain IMO.
Skyactiv Short Shift Arm Adapter [SKY-SSP] - $106.50 : James Barone Racing, Aftermarket Performance
DIY is the best, with superb pictures that make a sort complicated install, do-able.
\http://jamesbaroneracing.com/suppor...ort/2014+ Mazda3-6 and 2013+ CX-5 Short Shift Arm Installation Instructions.pdf
31) Just added MX-5 ND shift knob. Nice that it is more heavily weighted than OEM. Buy from Tascaparts.com @$124 total. PN's, from tascaparts.com (very nicely discounted):
For the Miata/MX-5 ND knob itself: N244-46-030B; and for the metal shift gates pattern cap: N243-46-032
There are some special install notes for my minor install customization. Important to read the following thread before proceeding, and if you wish to do it as I did, specifcally reading my post # 27 -- which raised the top of the shift knob a net of about 3/8".
http://mazda3revolution.com/forums/...da-3-skyactiv-appearance-interior/199506-oem-miata-nd-leather-shift-knob-3.html
32) Installed black Mazda "under door trim" molding (bye bye chrome ones). Paid $68 total (discounted 15% off list); P/N's: BHN9-50-640C; BHN9-50-650C; BHN9-50-660D; and BHN9-50-670D.
33) Front "U" shaped grille trim now painted Mazda's Jet Black Mica to match surround grill and splitter. Picture in post # 217.
34) UPDATE NOTE: This mod was later removed, as it was too large in diameter for comfortable finger grip.
Added "FMS" steering wheel cover as I felt the OEM steering wheel circumferential spoke was too small and diameter, and its leather covering too slippery.
Please see post #'s 244 & 245 for a picture, DIY install video, and my "driving report" after its installation.
You can buy it from the manufacturer here for $28.00:
http://autofms.com/product/fms-genu...ch-automotive-interior-accessories-black-durable-breathable-anti-slip-odorless/
Or cheaper at Amazon @ $23.79.
35) Centerline, low, front license plate mounting system (contact member @minsanity for getting one). It worked perfectly for me. $120 cost.
Pictures and install info in post # 246 of this thread.
36) Installed stronger, rear sway bar endlinks, and moved the Progress sway bar to its "strongest" setting. $69 (shipped), by GRP (German Racing Parks).
http://www.ebay.com/itm/28165096785...81650967850%26srcrot%3D711-53200-19255-0%26rvr_id%3D1177742979340&ul_noapp=true
37) Leather shift boot cover by Jason@Overland-Designs. $70 and so worth to me it, e.g., replacing the OEm vinyl one with real leather, and a touch more, matching gray stitching. Jason's work@Overland-Designs is outstanding (I have six different items of his on my '17 WRX). While he previously only did his leather word on Subaru items, I sent him, and he now has, a pattern for the 2014+ Mazda 3 manual trans, shift boot cover. If you are interested, either call him at: 1 (914) 621-2285 (EST), or email him: sales@overland-designs.com
38) I relocated the shift pin location on my James Barone Racing shift arm linkage (within the engine compartment). Where it was already a 20% shorter shift ratio, by moving the pin to its second location, my shifts are now 40% shorter than OEM. A really nice improvement on an already excellent system.
39) Grill surround “U” trim painted black. While this was done two months, forgot to include it here. I had tried four different folks to “wrap” it, and each one chickened out when they saw it, sawing things like, “well I hope I can do that, and it is going to cost you $175 even if I fail,” yada, yada. So I had my excellent body shop paint it Mazda Brilliant Black Metallic for $235. Not the cheapest option, but more durable than wrap and while many of you are good “wrappers,” that is not in my skill book.