2004 to 2020 Mazda 3 Forum and Mazdaspeed 3 Forums banner

2012 Skyactiv Turbo Build

21K views 35 replies 9 participants last post by  Skyler westgate  
#1 ·
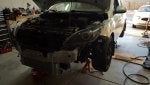
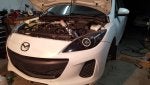
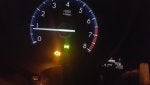
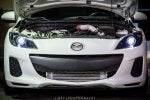
I dont know where this really belongs, but i believe that i feel like posting it somewhere is not a bad idea. For this entire post i will give as much detail as possible, as well as costs on all of the modifications that i had to do to achieve this. I haven't actually started the install yet, but i have almost everything. And it begins. Here are the details

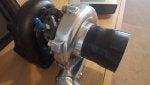
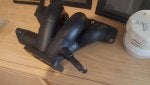
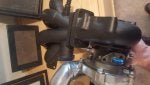
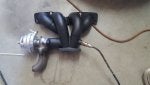
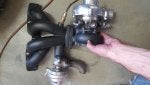
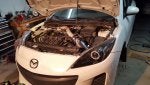
Turbonetics 57 mm Turbo
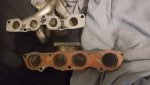
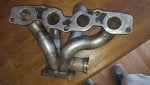
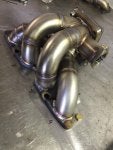
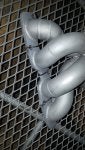
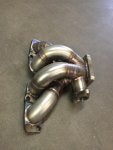
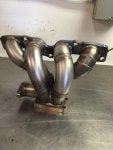
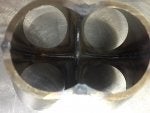
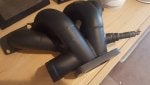
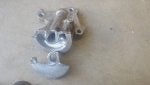
Custom built Skyactiv manifold
Tial 38mm 2 bolt WG
HKS SSQ Bov
Unknown 3core rad but its beefy
3.5 BAR MAP sensor (corksport) could have gone smaller for cheaper
Tuning from OVTuned


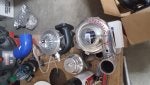
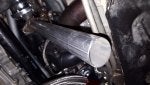
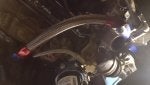
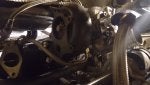
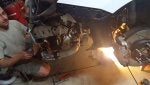
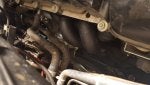
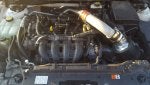
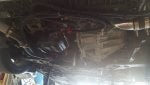
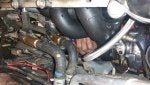
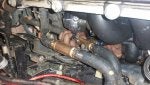
So for post one i am going to go over the oil drain/oil pressure line.

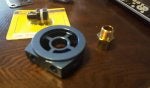
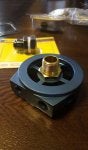
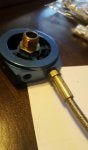
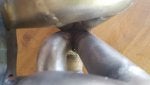
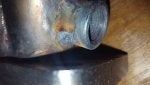
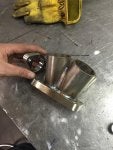
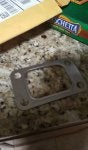
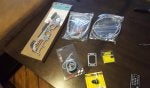
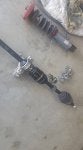
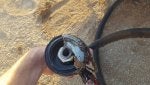
For the pictures i installed an oil drain in the drain pan, its a 10an bulkhead fitting and i used RTV black to seal it as well as the teflon gaskets. The feed is a sandwhich plate, and i bought a CXRacing oil feed kit.
 

Attachments

Discussion starter · #2 ·
The Manifold 1.0

So i ordered a manifold from OVTuned back when they were in partnership with Peak Performance, and when OVTuned quit peak botched my manifold up, so i had to get a full refund and it was a total pain. Here is manifold 1.0. It has 2 holes, a warped t3 flange, a shitty engine flange. Basicallt everything sucks about this manifold. Im debating getting it fixed and selling it but idk if its worth it, if anyone is interested in it for a good price PM me if your a welder.
 

Attachments

Discussion starter · #3 ·
Turbo Manifold 2.0

So i took the manifold to a local fabrication guy, and got em to replicate it. I had to build the turbo flange in CADD for it to be CNC plasma cut, and that went well haha. Attached are the CADD drawing i went off of.
 

Attachments

Discussion starter · #4 ·
Relief cuts and cerakote

So i put relief cuts in the manifold, and am going to high temp cerakote the manifold (i own a powdercoat buisness as well as ceramic coating which i am just getting into this will be my first coating) I need ot buy a new gun tomorrow to coat it.
 

Attachments

Discussion starter · #5 ·
All the parts

Okay here is a pic of all of my turbo parts on the table before installing em. The manifold gasket is the wrong one i sent it back. I also bought a SIMOTA SRI for the intake side, that i dont have any pictures of.
 

Attachments

Discussion starter · #6 ·
Ill throw a price list on here for yall in care your curious.
Turbo Manifold 1180 (new good one)
Turbo kit used includes turbo, WG, some ic piping, IC bov, 660$
Turbo Oil Feed Kit - 55$
Oil Sandwhich plate - 44.50$
Oil Pan Bulkhead Fitting - 23$
3 BAR Map sensor - 90$
IC piping kit and MISC fittings (so far) - 180$
Tactrix Cable for tuning - 192.50
Boost guage/AFR and Electronic Boost Controler - 380$
T3 Manifold Gasket - 27 (I think thats wrong)
Simota SRI - 220$
Water line kit for turbo - 40.5
Manifold Gasket OEM - 30$
Tuning OVTuned - 785$

Total im at 3907.50$ right now. I dont really need anything else that i can think of other than some couplings to adapt the FMIC
 
Discussion starter · #8 ·
I ceramic coated the manifold over the weekend, and got some decent pictures it looks great. The total price of doing it myself was a bit over 100 in materials. It should be worth it not needing to heat wrap the hell out of this thing. This is legit Cerakote High Temp Coating.
 

Attachments

Discussion starter · #9 ·
Anddd this was build weekend, got alot accomplished, and learned alot. It in total took me and a friend a little over 22 hours of actual work. My manifold fit perfectly and i had to fabricate up the screamer pipe and downpipe. I will make a few posts to kind of go through the build process. Is anyone interested in a step by step, or a legit parts list? Also im sure i could get my fabricator to make another one of these manifolds if anyone is interested. Idk how much interest there is in Sky Manifolds.

So for these pictures left to right, i puled the car into the garage after gettting the rx7 racecar out haha, that was a chore. Got the bumper ripped off, and started to mount the IC you probably cant see it but the IC is held up with zip ties lol. The turbo compressor housing had to come off to get rewelded because the 90 didnt work, so in the last picture you can see the straight i put on it. Then the manifold with the WG bolted up and the turbo on there for show. God its pretty hahah.
 

Attachments

Discussion starter · #10 ·
I had to chop the stock down pipe in half to remove it from my bay since i didn't wana drop the subframe, it worked out well because i got to use the stock flexpipe for my downpipe since its 2.5" and had a bung in it already. This was alot of fun since ive never done it, my Lincoln powermig 180 made short work of creating the exhaust, i am no welder by trade but it doesn't leak and worked really well.
 

Attachments

Discussion starter · #11 ·
My screamer pipe also had a 90 welded to it, that i chopped off to put a straight pipe on. This worked well but i am planning on buying the proper piping to run it down the exhaust tunnel so i can run the stock underplastics without cutting a huge hole in it.
 

Attachments

Discussion starter · #12 ·
So to make the exhaust i had to mount the manifold and turbo, here are the pics from the bottom, its kind of disorienting to look at but you will get the jist of it.

Three of those pics are with the 90 welded on there, you can see why it didnt work. It was facting towards the wheel and there was no room, if the 90 was in the other direction i would have been fine. Oh well it cost me 100 bucks ot have that fixed as well as brackets tig welded to the IC to mount it to the bumper bar.

I neede dto buy a 90 degree -10 an fitting to put the drain in. I was happy with how it turned out it seems to be draining fine even though there isnt much angle.
 

Attachments

Discussion starter · #13 ·
Intercooler routing was a bear, it wasnt too bad but its like a jigsaw puzzle. I had a 2.5 kit and then some misc 2.5 pieces to make everything work. I needed 2 2.75-2.5 90s to make everything work well, cuz of the throttle body size as well as turbo inlet size. The scond picture was the first routing option that i didnt go with i chose undermounting both the ic inlet and outlet pieces.
 

Attachments

Discussion starter · #14 ·
Looking down at the manifold i used the heater core lines for my turbo water inlet. That was kind of a ghetto contraption with brass barbs and stuff but it worked fine. And then the final project and the first start up running pictures. I will have a video up later i got a CEL also, but it was not due to the turbo as far as i know.
 

Attachments

Discussion starter · #18 ·
Bruns, i am the second the first one was built by OVTuned in their shop im the first individual to just do it. Im in the tuning process currently on tune 2 with a max of 5.1 psi ive seen at the throttle body. In the initial data logs (very safe tune) i have seen less than 1 degree of timing on the knock retard which is very good. And it pulls like crazy when i get into boost. Still cant do WOT though.
 
Discussion starter · #22 ·
I am planning on raising the boost to 7.05 psi (thats what my WG is set at, i am running my WG on compressor pressure not manifold pressure currently)
So far i am on tune #4 and it pulls very hard, its alot of fun. Here are some more pics and videos of the tune 3 pulls where i was hitting limp mode every now and then. It pulls so much harder now.

https://www.youtube.com/watch?v=RYgOyFUyffI
https://www.youtube.com/watch?v=3OLf2Z8azp8
 

Attachments

Discussion starter · #24 ·
Got an oil filter relocation kit, my filter with the sandwich plate hangs super low. I got one with a oil out on the filter side to run the turbo off of, hopefully it works well. Also comes with an oil cooler, so maybe th eoil will settle at a lower temp under boost.
 
Discussion starter · #25 ·
So, the low life has finally got me. Hit a dip in the road and shelled off my oil filter relocation kit. Got new parts on order, but that was a headache so far. Had to remove my transmission half shaft and torque tube (idk the technical name). I am going to be refreshing my gear oil with redline MTL.
 

Attachments